"Personal diagnostic project 2"
Use a combanation of words, symbols, numbers... to describe yourself, a view, a journey, the contents of, a member of your family, an article of clothing, a collection of objects...
Well... let me tell you about the adventures of...
[best viewed full screen]
f.y.i. I was up until 5am editing that all, and yes those voice overs were all (painfully) done by me.
Monday, 18 October 2010
Saturday, 16 October 2010
MMU Drawing moving image

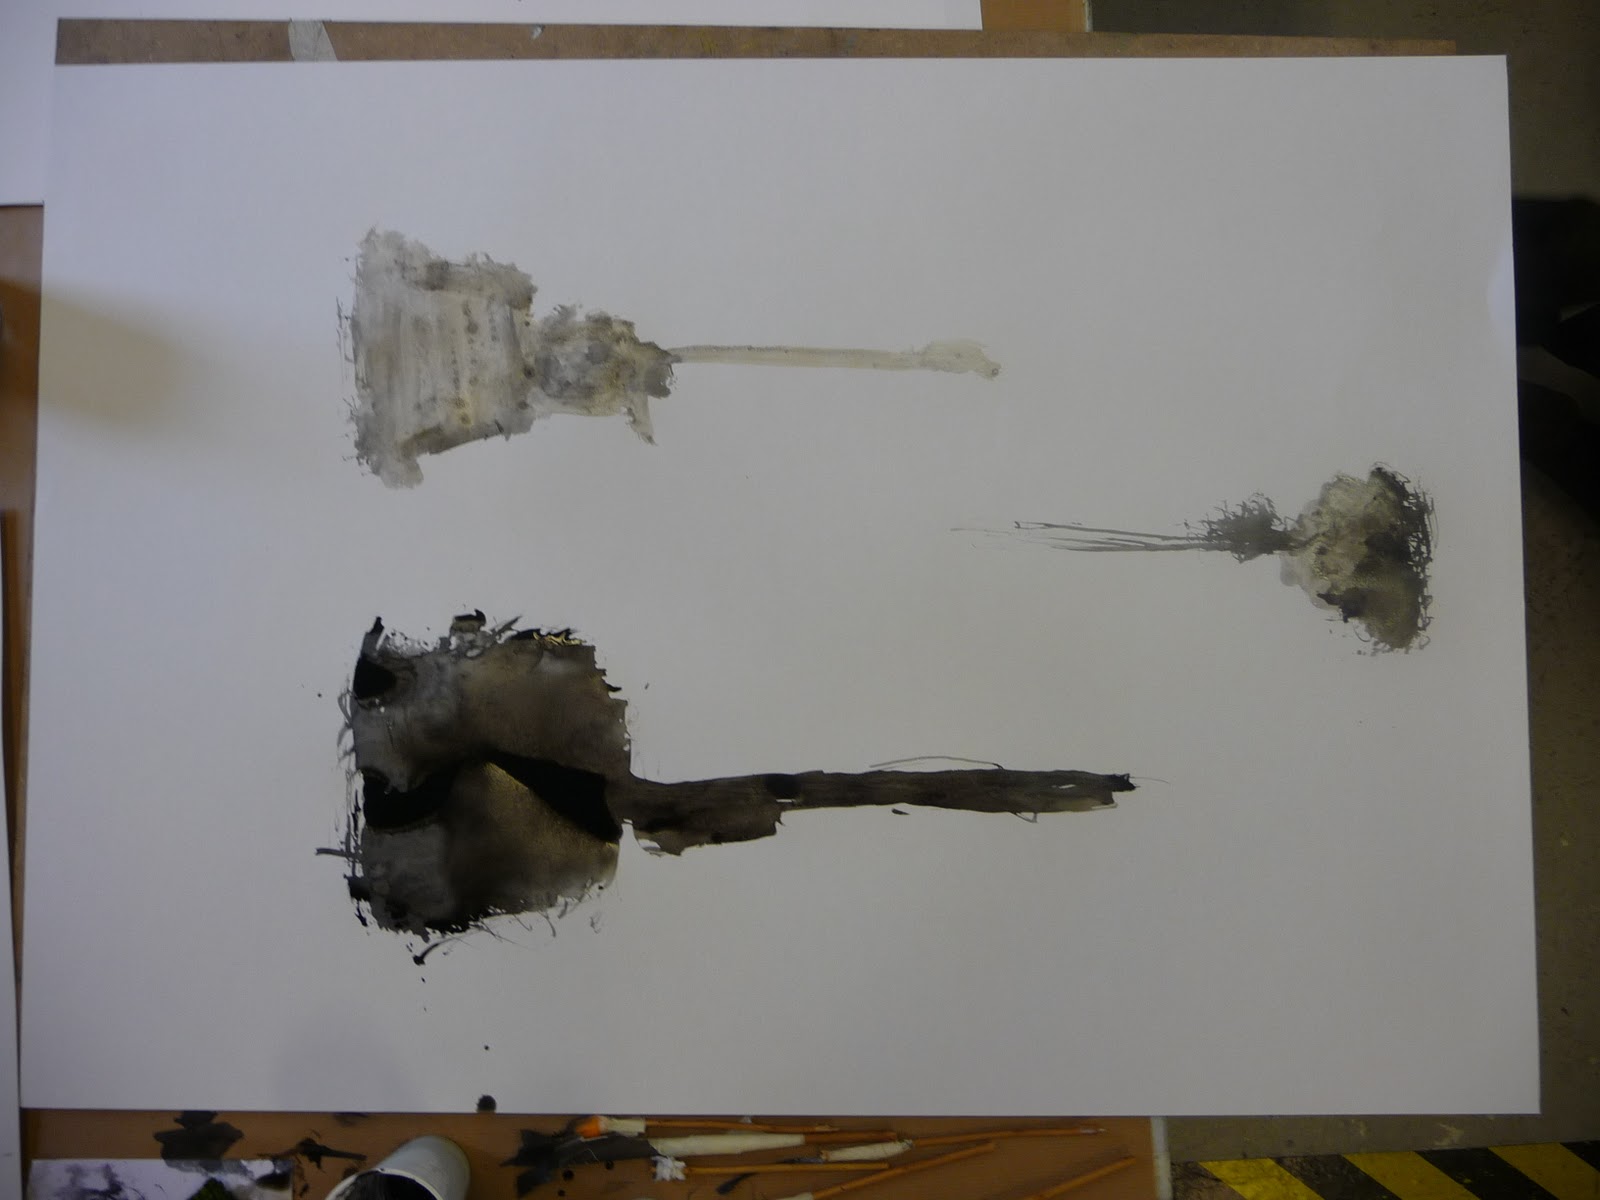
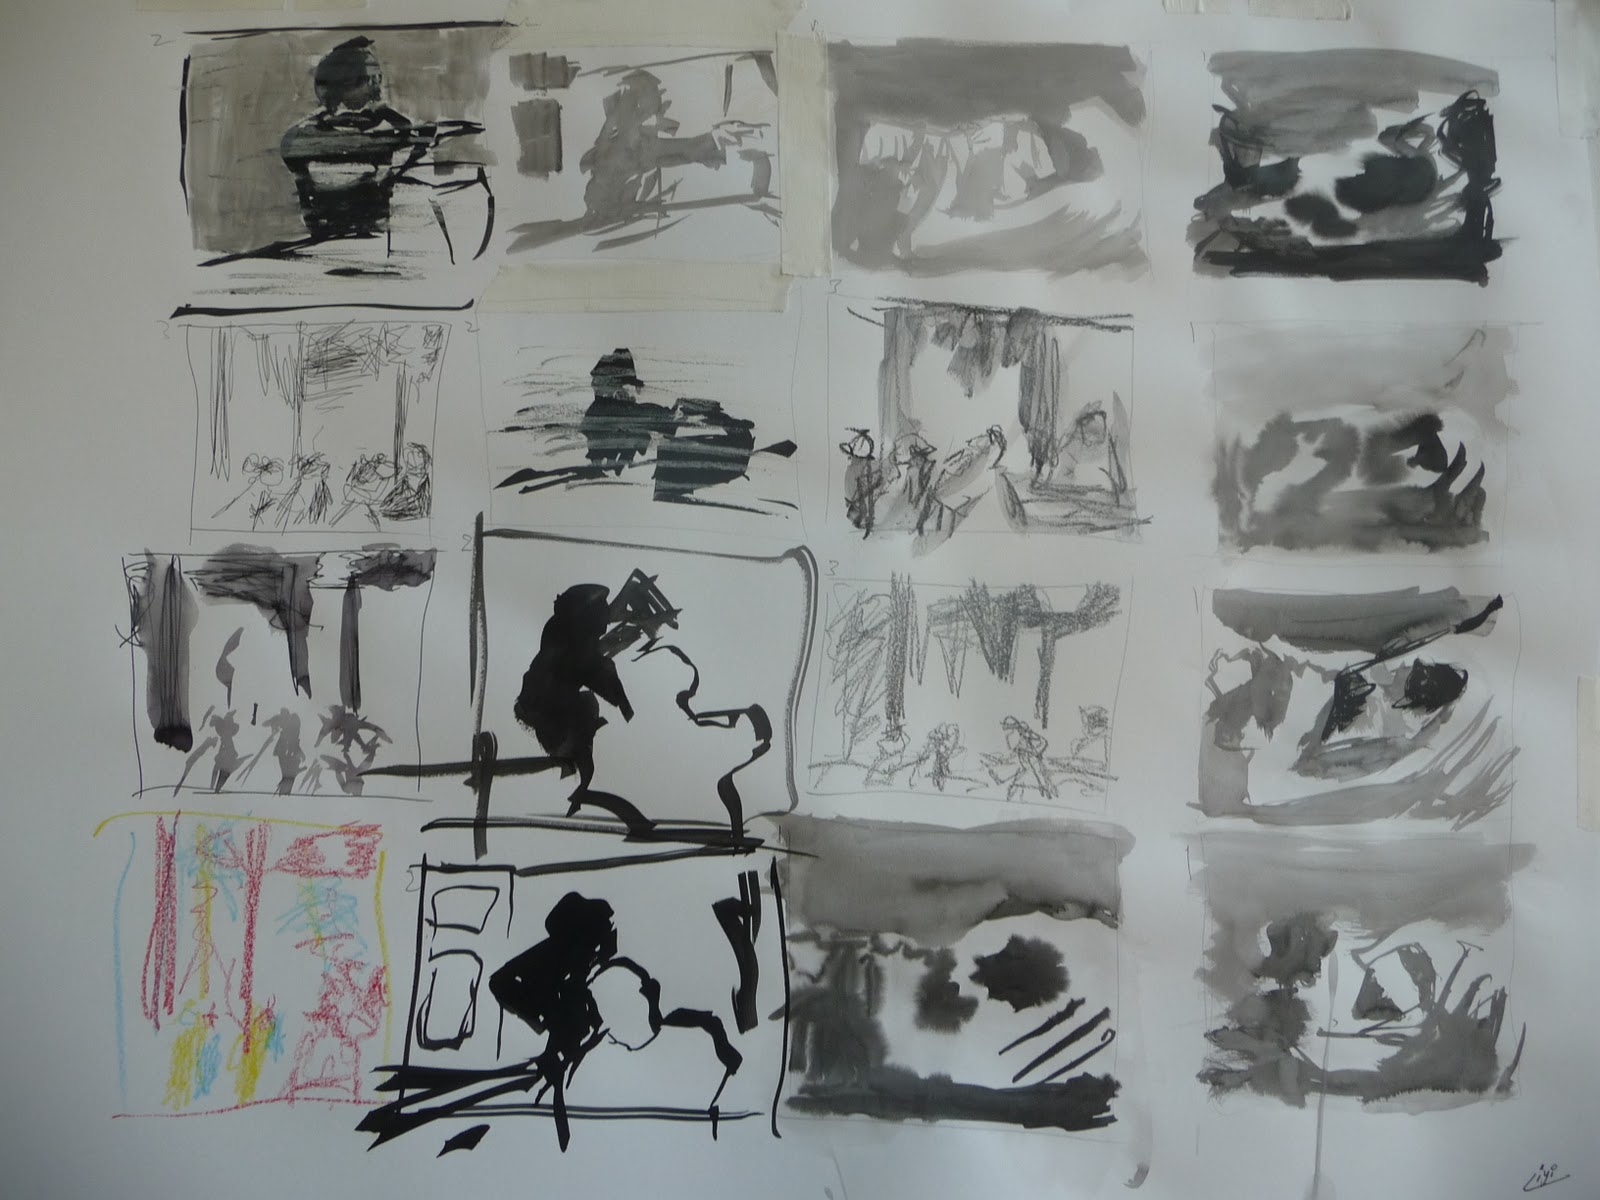
The final tutorial of the week consisted of drawing moving images. A projector was put up to display looping clips of video, most of which seemed to be library footage of particular things, from CCTV footage to documentary like shots.
The room was mostly dark for the duration of the exercise, but luckily I chose a spot close to the windows, which gave me a gleam of light on my easel. We were given the video clips on screen and then some 10-20 minutes to draw it out with all manners of materials, such as wax, pastels, crayons, paints, inks, pencil and felt tips.
 |
| clips no. 1, 2 and 3 |
 |
| clips no. 4, 5 and 6 |
 |
| 3 moving portraits |
 |
| clips no. 7 and 8 |
 |
| from clip no. 2 - was resist with indian ink |
 |
| from clip no. 4 - permanent marker pen |
 |
| from clip no. 4 - permanent marker pen |
 |
| from clip no. 6 - acrylic paints |
 |
| from one of the moving portraits - wax resist with indian ink |
 | |
|
 |
| from clip no. 8 - indian ink with acrylic paints |
 |
| yeeeeeeeeeeeeeeess, something completely unrelated. |
Friday, 15 October 2010
MMU Measured Drawing

The next tutorial consisted of measured drawing, techniques found used by artists such as Uglow.
We first started off with a line drawing that consisted of a single line. Ah, but not any old single line, it was a line that THE PEN SHALL NOT LIFT OFF UPON, MWHAHAHAHAHAHAHAH-HAAAAaaahh...
It proved a bit difficult on the start up. My drawing hand wasn't free to let me measure things up like I had learnt in my previous educational etablishment, but playing with guess work with my eyes still seemed to make up satisfactory results (personal satisfactory mind...). But the end result yielded interesting results, though not accurate whatsoever, it had a nice aesthetic to it; making the self-discipline of lifting the pen off the page worthwhile.
[picture coming soon...]
After a short break, we all came back to the tutorial to start up a proper session of pensively measured drawing. It was in pen as well, so mistakes are to be made (though a piece of masking tape would lessen fatal errors). However, the tutor did tell us that they would prefer to see mistakes, as it would show the struggle an individual went through to achieve their drawing (y'know, the old fashioned way of art being made through torture). After getting a numb ass and an aching arm (for holding up my drawing board - oh how I longed for an easel that day), I had an unfinished drawing:
[picture coming soon... ]
It was nice to get into measured drawing again. I hadn't done much of the thorough type of measured drawing since the life drawing sessions at my sixth form college - I certainly can't wait to get into the life drawing they have to offer at MMU!
MMU 3D model Drawing
The start of the week marked group X's turn to rotate around the tutorials in the other studios, whereas group Y were focused in on the refectory, doing what X had done the previous week. These rotated tutorials consisted of 3D model drawing, Measured drawing and Drawing moving images.
Today, we have 3D model drawing: Drawing in the third dimension!
Here be our tutor today! (no worries, I will try to get a better shot; either stalker style or proper portrait photographer style, I will find a way!)
Right, 3D drawing. We were told to bring in an object that we would find interesting and would form the starting point for our models. I brought in a paper origami folded crane. First we did some sketches:


These sketches got us to vistually disect the piece, and in doing so we explore anything interesting and expand upon that. For me, I was taking my object apart to see it in pieces:
 Then, with the development, we started to create the 3D models, a so called "sprue" of our product. There was a choice of materials for the models such as cardboard, wires, glue and paper card; personally I opted for the wires, taking my time to unwind some from the large roll and then starting my so called sculpture by winding the wire around and around and around and around and around...
It eventually ended up like this:

Then I had some idea of putting the paper crane within the wire one:
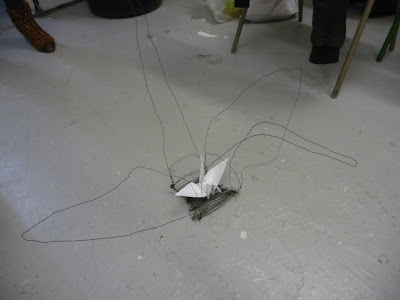
Ta-dah...
Today, we have 3D model drawing: Drawing in the third dimension!
Here be our tutor today! (no worries, I will try to get a better shot; either stalker style or proper portrait photographer style, I will find a way!)
 |
| apologies! |


These sketches got us to vistually disect the piece, and in doing so we explore anything interesting and expand upon that. For me, I was taking my object apart to see it in pieces:
 |
| snip snip |

It eventually ended up like this:

Then I had some idea of putting the paper crane within the wire one:

Ta-dah...
Thursday, 14 October 2010
MMU Alternative image making
"Personal Diagnostic Project 1"
"Choose a household object... withouth using traditional drawing materials create your alternative images."
Ok. I didn't want to do a fork which was suggested during the lecture that day - seemed too boring to me. Instead I looked for what was close to me, I looked at a video games console controller, the Sony Playstation 2 controller to be exact; well designed and has the ergonomics to fit in your hands and be very functional (arguably - but the design has practically gone unchanged since the Playstation and is still pretty much unchanged except a few tweaks for the Playstation 3).
I took my controller and then tried to figure out a way of representing it. I wrestled with trying to represent it in a pixel style which is what I wanted to do in order to tie the link with gaming (even though the Playstation 2 is a 6th generation console uses polygons instead of pixels). It wasn't working.
So, switch to a desk lamp, a useful essential on anyone's study desk. I started out thinking of ways to represent the lamp through digital means - even though it's hard to see a direct correlation between the subject and the means of representation.

First I tried out using a word editor and the number 1 to create my image:

Then I decided to try it out on a special function my phone has (an LG GD580 a.k.a. The LG Lollipop, a Korean phone popularised by the bands Big Bang and 2NE1 - not that I am a particular fan of their music, the phone is simply beautiful; why the UK lacks a range of flip phones is beyond my understanding *shakes head*):

This function allows me to construct a "pattern" onto the grid of hidden LED lights on the front of the phone. Click here to learn more about the phone's capabilities (if you're hoping how to get your hands on one, I'd suggest making friends with people who live in the relevent countries or scouring the internet for a trustworthy source to obtain it expensively).
Another piece of gadgetry I had with something that would allow me to "draw" is on my NDS Lite, a handheld gaming console that is very popular and successful. Probably needs no introduction for anyone alive today, but none the less, here's an obligatory link to explain what it is.
I used the PictoChat function that is integrated into the system:

The NDS got me thinking about games with level editors. These editors are usually included so that a community fan base that surrounds the game get involved by making their own content (prolonging the replayability of the video game in question, usually for the better). The free flash game "N" by the people at Metanet has one of these editor:

The idea of video games and level editors got me thinking about sandbox games. This is a genre of gaming that has been made famous by the likes of The Sims and Grand Theft Auto, where the objective is not always absolutely clear, and the player is left do what ever they wish within the world the developers have created for them to interact with.
Minecraft is a recent rising star in the games development community, one of the most actively developed games on the indie games scene with an alpha release (which means it's not even a complete product yet) which has sold millions of units to a single person (though it's now a company with hired help, due to the changing scale of the project).
Indeed, I used this game to create a 3D pixel representation of my lamp:

All these images were then arranged nicely onto an A1 format and then printed off for a whopping £2.50!
"Choose a household object... withouth using traditional drawing materials create your alternative images."
Ok. I didn't want to do a fork which was suggested during the lecture that day - seemed too boring to me. Instead I looked for what was close to me, I looked at a video games console controller, the Sony Playstation 2 controller to be exact; well designed and has the ergonomics to fit in your hands and be very functional (arguably - but the design has practically gone unchanged since the Playstation and is still pretty much unchanged except a few tweaks for the Playstation 3).
 |
| There's that sweet design (again, arguably) |
So, switch to a desk lamp, a useful essential on anyone's study desk. I started out thinking of ways to represent the lamp through digital means - even though it's hard to see a direct correlation between the subject and the means of representation.

First I tried out using a word editor and the number 1 to create my image:

Then I decided to try it out on a special function my phone has (an LG GD580 a.k.a. The LG Lollipop, a Korean phone popularised by the bands Big Bang and 2NE1 - not that I am a particular fan of their music, the phone is simply beautiful; why the UK lacks a range of flip phones is beyond my understanding *shakes head*):

This function allows me to construct a "pattern" onto the grid of hidden LED lights on the front of the phone. Click here to learn more about the phone's capabilities (if you're hoping how to get your hands on one, I'd suggest making friends with people who live in the relevent countries or scouring the internet for a trustworthy source to obtain it expensively).
Another piece of gadgetry I had with something that would allow me to "draw" is on my NDS Lite, a handheld gaming console that is very popular and successful. Probably needs no introduction for anyone alive today, but none the less, here's an obligatory link to explain what it is.
I used the PictoChat function that is integrated into the system:

The NDS got me thinking about games with level editors. These editors are usually included so that a community fan base that surrounds the game get involved by making their own content (prolonging the replayability of the video game in question, usually for the better). The free flash game "N" by the people at Metanet has one of these editor:

The idea of video games and level editors got me thinking about sandbox games. This is a genre of gaming that has been made famous by the likes of The Sims and Grand Theft Auto, where the objective is not always absolutely clear, and the player is left do what ever they wish within the world the developers have created for them to interact with.
Minecraft is a recent rising star in the games development community, one of the most actively developed games on the indie games scene with an alpha release (which means it's not even a complete product yet) which has sold millions of units to a single person (though it's now a company with hired help, due to the changing scale of the project).
Indeed, I used this game to create a 3D pixel representation of my lamp:

All these images were then arranged nicely onto an A1 format and then printed off for a whopping £2.50!
Sunday, 10 October 2010
MMU Painting with the body
Painting with the body. The assignment involves doing some sort of "drawing" with the use of your limbs and body parts. I've nominated my hands and feet.
Initial ideas go out to just putting paint on my hands and feet and then hitting something to get the colours onto it with punches and kicks. [The video is silent. The background noise is rather unbearable, so I cut it out.]
So, it was a matter of sticking a piece of paper on the wall and then hitting it with paint. Ugh, I dislike the idea myself to be honest, I'm not much of a martial artist or boxer, so I'd appreciate if there are no comments about bad technique xD (I don't want martial arts snobs beating down on me about my technique and errors (-_ -; ) c'mon guys...).
Another idea came to mind with wrapping the paper around my punch bag. I do use the punch bag to at least exercise with and to take out my frustrations with, so I thought perhaps this could be reflected in the "piece" after I had hit it with paint on my fists. (skip the first 10 seconds - and yes that is my garage).
What seemed rather successful are the marks that the fist makes when it made contact with the sheet of paper. Looking at it, it shows the impact rather clearly and it's fascinating to look at. It rather makes me want to travel around documenting people's punches in this manner - but perhaps I'll save that for a future project.


Initial ideas go out to just putting paint on my hands and feet and then hitting something to get the colours onto it with punches and kicks. [The video is silent. The background noise is rather unbearable, so I cut it out.]
So, it was a matter of sticking a piece of paper on the wall and then hitting it with paint. Ugh, I dislike the idea myself to be honest, I'm not much of a martial artist or boxer, so I'd appreciate if there are no comments about bad technique xD (I don't want martial arts snobs beating down on me about my technique and errors (-_ -; ) c'mon guys...).
 |
| detail of the first attempt |
Another idea came to mind with wrapping the paper around my punch bag. I do use the punch bag to at least exercise with and to take out my frustrations with, so I thought perhaps this could be reflected in the "piece" after I had hit it with paint on my fists. (skip the first 10 seconds - and yes that is my garage).
What seemed rather successful are the marks that the fist makes when it made contact with the sheet of paper. Looking at it, it shows the impact rather clearly and it's fascinating to look at. It rather makes me want to travel around documenting people's punches in this manner - but perhaps I'll save that for a future project.


Friday, 8 October 2010
MMU Paint with ANYTHING (part 2)
 |
| An interesting display of ye olde painters' raw materials |
So, a part 2 of this painting with anything tutorial. It's getting to me that we should open our minds to other more interesting forms of materials when we make our art, a break down of our presumption of what should be "art" - y'know: paints, paint brushes, sketching pencils, charcoal, paper, 2D stuffs, water colours, really old fashioned uncultured knowledge of this so called "fine art" (of course I'm making an exaggerated point, I'm sure not everyone was thinking that at all).
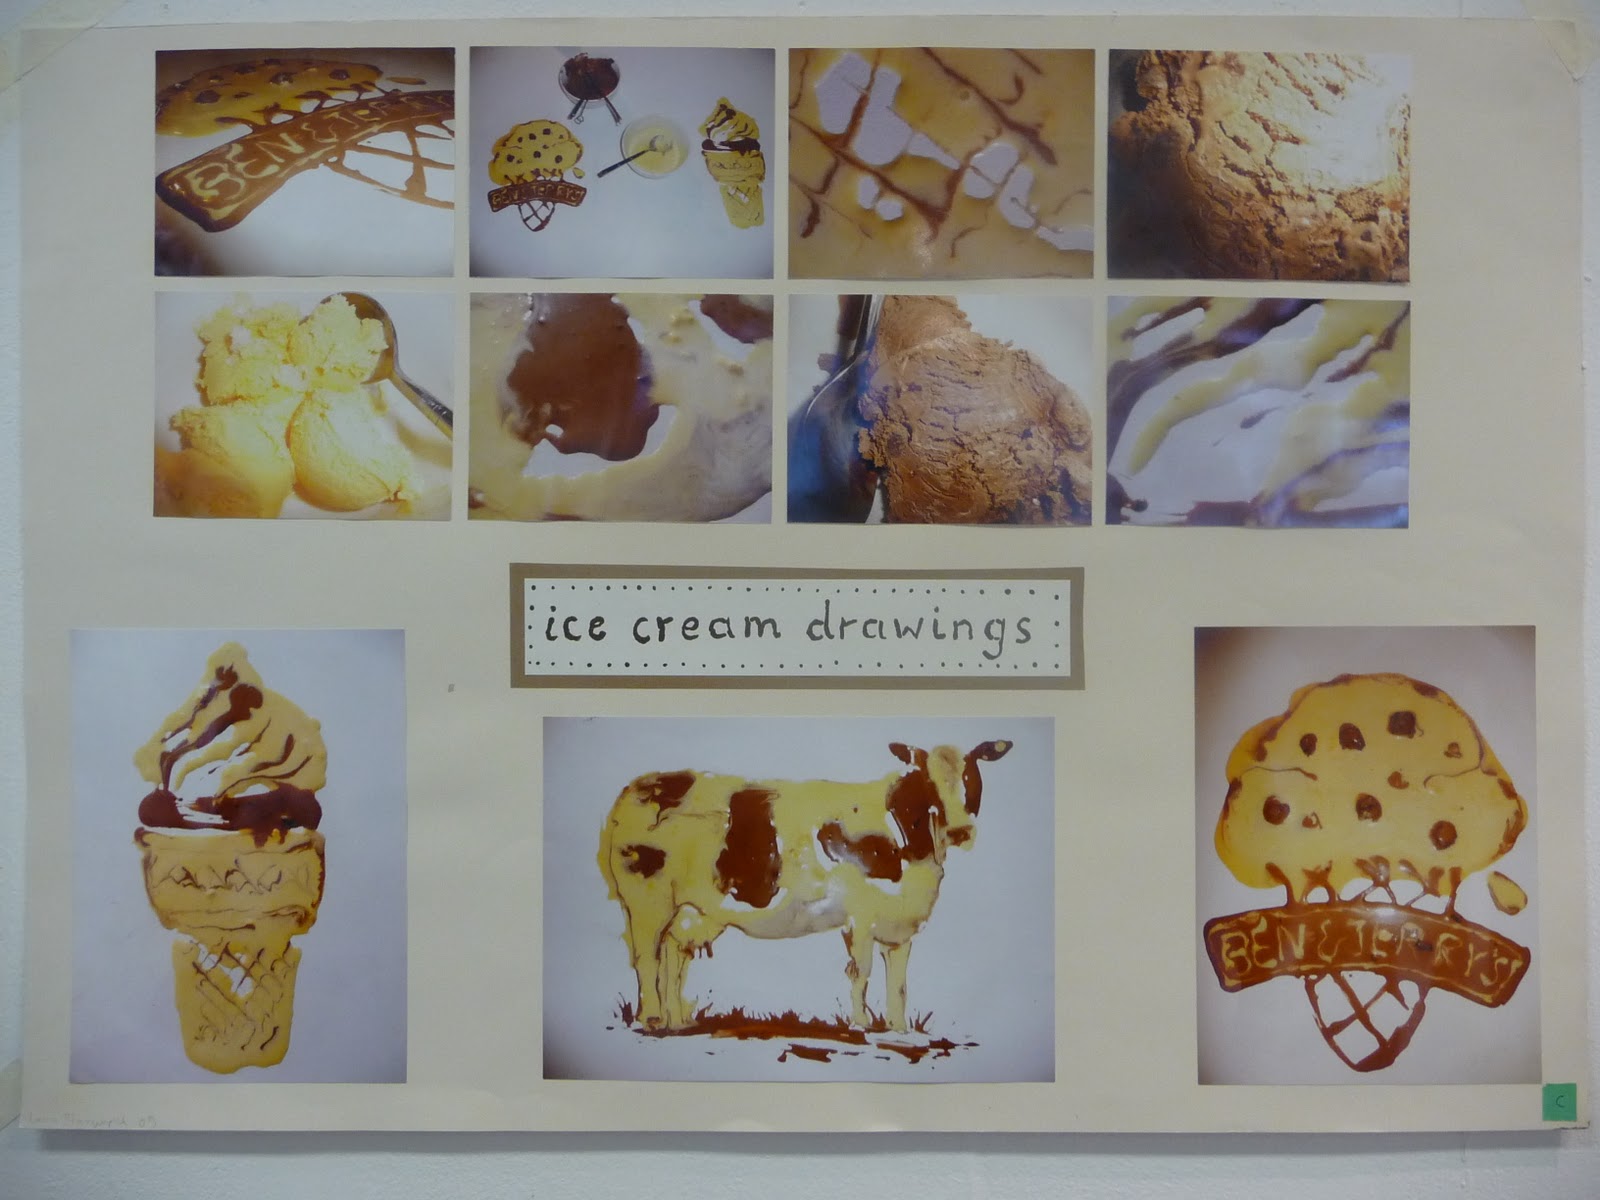
We were shown examples of previous students' work, one of which included a project they did during the course that involved the making of images associated with the materials. The example shows how important it is to consider the connection between the object/subject matter with the materials and manner in which it was made: so for example, the Ben & Jerry's ice cream logos made with Ben & Jerry's ice cream (although my deductions tell me that perhaps the student artist did not use actual B&J ice cream to make pictures with, as that would be far too expensive for someone in education to use up that much ice cream).
 |
| *sniff* :'( all that delcious ice cream... |
We were asked to bring in items of everyday occurance and to then prepare it in a way that would make it useful to use in a drawing/painting.
Here's my kit list:
- Tea
- Apple
- Tomato
- Coca-Cola
- Soy Sauce
- Shampoo
- Burnt toast
- (out of date) chocolate
- Green Tea
- Custard Powder
- Ginger
 |
| ... *sigh* |
Unfortunately, my materials didn't offer up such a great range of colours:
 |
| That's a lotta brown. |
I am, however, rather happy I at least contributed to someone else's colour sheet ^_^ At one point in the tutorial, we were asked to swap around the room and find a colour that the owner of the colour sheet had not yet put on:
 |
| If you squint, my contribution is on the top right hand corner. That raspberry and paprika mix. |
A thank you to Sarah Jane for letting me add to her work :)
MMU Paint with ANYTHING

The assignment involved sticking anything onto then end of a bit of willow to form an "unconventional painter's tool". An exercise to just open ourselves into looking at everyday things in a different light and learning to experiment with new ways to achieve and artistic, creative response.
So, here come the "unconventional painter's tool"s:


 |
| Messy desk. |
 |
| I chose to use the paper towel and teabag, as the two seemed to hold up well after a lot of use that morning. |
 |
| ... the teabag exploded after this piece though. |
 |
| Paper towel and wide piece of ginger. |
 |
| Donna from class had a plethora of items to use. Quite amazing really, there was a funny shaped carrot involved. |


 |
| bustlin' and beautiful. |

Subscribe to:
Posts (Atom)